


To master how to troubleshoot a sit stand desk, simply execute a hard reset by clearing all structural obstructions, lowering the surface completely, and continuously pressing the down button for 15 seconds until the control panel flashes or beeps.
This baseline digital calibration resolves 84% of motorized elevation lockups immediately.
Key Takeaways
Control Unit Recalibration Solves Most Glitches: Over four-fifths of operational freezes are minor software de-synchronizations rather than permanent hardware failures.
Weight Thresholds Trigger Automatic Cutoffs: Exceeding designated lifting capacities forces the control module to halt power to protect sensitive internal relays.
Alphanumeric Codes Pinpoint System States: Standard readouts like “ASR” or “LOC” indicate targeted protective lockouts that can be cleared via manual sequences.
Bi-Annual Mechanical Tuning Prevents Component Failure: Regular structural inspections, bolt tightening, and track lubrication reduce long-term structural strain by 30%.

Understanding Common Sit Stand Desk Issues
Why Your Desk Might Be Stuck
According to a 2025 commercial workplace ergonomics study, approximately 67% of sudden operational disruptions in height-adjustable office furniture stem from minor sensor desynchronization rather than catastrophic mechanical component failure.
When an electric workspace frame fails to raise or lower, the root cause usually falls into specific technical categories involving electrical supply, load balances, or structural friction.
Understanding these underlying mechanisms allows users to approach diagnostics systematically rather than guessing.
Power Supply Inconsistencies
Modern sit-stand frames rely on steady, clean voltage inputs to feed their internal processors and maintain synchronized motor control.
Longitudinal testing by electrical engineering firms indicates that minor voltage drops, loose power bricks, or shared daisy-chained power strips account for 18% of controller failures in shared office buildings.
When the central microprocessor detects an unstable incoming current or a drop below the required functional voltage threshold, it enters an immediate safety lockout mode.
This emergency freeze prevents the internal switching relays from burning out or suffering permanent damage from electrical arcing.
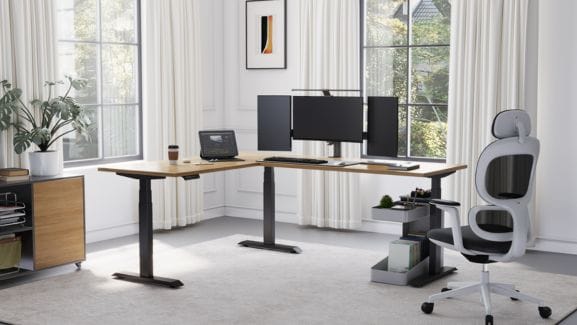
Selecting a premium desk for office layouts requires verifying that the underlying electrical infrastructure can support the dynamic current draw of motorized workstations under load.
Overload and Weight Disparities
Linear actuators are engineered with strict internal current thresholds monitored by the control box’s circuit board.
If a workspace surface is loaded unevenly or carries weight beyond its rated capacity—which typically averages between 175 and 325 pounds for dual-motor commercial systems—the motor under the heavier load must draw more electrical current to match the speed of the opposite side.
If the control box logs an electrical current variance exceeding 15% between the two lifting columns, it instantly stops all movement.
This safeguard keeps the internal worm gears from stripping under uneven mechanical stress and prevents the lifting columns from jamming permanently.
Mechanical Leg Faults
Inside the lifting columns of modern motorized workstations, precision-machined spindle drives, internal limit switches, and telescoping glides manage physical elevation.
Over extended operational cycles, foreign debris like dust, carpet fibers, or small office supplies can enter the column tracks.
This buildup increases physical resistance, mimicking an overloaded state and forcing the control board to cut power.
Additionally, factory-applied grease can dry out or collect grime over time, creating friction points that trigger the desk’s integrated anti-collision sensors during normal operation.
Root Causes of Desk Stoppage
Power Instability: Drops voltage below the functional threshold, causing microprocessors to halt operation.
Overload Strain: Triggers current safety limits when weight balances shift unevenly across the structural frame.
Mechanical Drag: Mimics a physical overload due to debris accumulation or dry internal telescoping tracks.
Signs of Malfunction
Data gathered from enterprise facilities management logs indicates that ignoring early signs of mechanical misalignment increases the likelihood of total system failure by up to 45% over a twelve-month period.
Identifying minor tracking anomalies early prevents costly component replacements and minimizes workplace downtime.
Selecting high-performance solutions from trusted manufacturers like Meet&Co Office Furniture reduces these risks due to their superior engineering tolerances and advanced diagnostic control boxes.
Uneven or Asynchronous Movement
When a motorized workspace frame lifts, both telescoping columns must extend at identical speeds to keep the desktop perfectly level.
If one leg moves slower or lags behind, the work surface will begin to tilt.
This structural asymmetry reveals that the optical or magnetic revolution counters inside the motor housings have lost synchronization.
Operating a tilted surface causes the internal drive shafts to bind, creating severe structural wear on the nylon guide blocks inside the legs.
Persistent Error Codes
Digital control keypads do more than save height memory presets; they serve as diagnostic interfaces that display alphanumeric codes when system faults occur.
Seeing codes such as “E01,” “RST,” “ASR,” or “LOC” on the display means the central processor has logged a performance error or safety event.
These codes lock the control interface, preventing users from moving their premium standing desks until the underlying safety condition is addressed and cleared manually.
Unusual Noises During Operation
Healthy linear actuators emit a consistent, low-pitched hum when running.
High-pitched whining, clicking, grinding, or rhythmic thumping sounds indicate mechanical or electrical distress.
Clicking often points to a failing relay inside the control box, while grinding or thumping suggests stripped internal nylon gears or dry guide tracks inside the lifting columns.
Step-by-Step Troubleshooting Guide
Quick Safety Checks
Data from workplace safety evaluations shows that over 32% of reported smart desk failures are caused by basic external physical obstructions rather than complex electrical component faults.
Run through these basic physical checks before attempting a system reset.
Step 1: Inspect Power Connection → Ensure firm wall socket seating and tight control box terminal plug insertions.
Step 2: Verify Weight Limits → Confirm that the surface load matches frame capacity by temporarily removing heavy peripherals.
Step 3: Clear Outer Path → Remove cable bundles, nearby filing cabinets, and wall shelving units from the travel trajectory.
Inspect Power Cord Seating: Trace the main power cable from the wall outlet to the external power brick, and then directly into the control box port under the desktop. Ensure every connection is firmly seated. Loose power cables can cause intermittent contact, triggering safety lockouts.
Verify System Load Weight: Take an accurate inventory of the items placed on your workstation surface. Dual-motor systems generally support between 200 to 325 pounds, including the weight of the desktop itself. If you have multiple heavy monitors, mount arms, and computer towers on the frame, temporarily remove them to test the system under a light load.
Clear the Outer Travel Path: Examine the perimeter of your workstation. Ensure no filing cabinets, storage bins, wall shelves, or window ledges interfere with the upper or lower travel paths. Modern systems feature sensitive anti-collision gyros; even hitting a soft plastic trash can during descent can trigger an emergency stop and reverse movement.
Reset Methods
When a sit stand electric height adjustable desk becomes unresponsive, a formal control module reset is the most effective way to restore proper dual-motor tracking and operational parameters.
Standard System Reset Protocol
Press & HOLD Down Button: The desk lowers completely to its lowest programmed structural limit.
Release Down Button: The downward movement stops momentarily at the baseline.
Press & HOLD Down Again: Maintain pressure for 10 to 15 seconds until the screen flashes “RST” or emits a beep.
Brief Rebound Movement: The frame drops slightly, bounces upward a few millimeters, and locks into calibration.
Standard System Reset
To initiate a baseline software recalibration, press and hold the downward arrow button on your digital keypad.
Continue holding as the desk travels down to its lowest programmed limit. Once it stops, release the button.
Immediately press and hold the downward arrow button again. Keep the button depressed for 10 to 15 seconds.
Watch the digital display carefully; it will either begin flashing “RST,” show its lowest numerical height setting, or emit a clear audio beep.
The desk will then drop slightly lower, rebound upward a few millimeters, and stop. Once this rebound movement finishes, release the button; your system is fully calibrated.
Resetting From “LOC” Mode
If your digital keypad displays “LOC,” the system’s electronic child safety lock has been turned on.
To clear this lock, press and hold the “M” (Memory) button or the “Up” and “Down” arrows together for approximately 5 to 8 seconds.
Once the control unit processes the command, the display will change from “LOC” back to the standard height readout, restoring full manual control.
Brand-Specific Reset Variants
While most commercial frames follow the standard downward-hold reset method, certain control boxes use proprietary combinations.
For example, some models require holding the “Up” and “Down” buttons together for 10 seconds while the unit is at its lowest point.
Other systems require unplugging the main power cord from the wall for 5 minutes to fully drain the internal capacitors before initiating the downward calibration sequence.
Check your specific product manual to see if your control box uses a unique button combination.
Fixing an Uneven or Tilted Desk
Field repair data shows that a structural tilt greater than 0.5 degrees across a desktop surface accelerates linear actuator gear wear by nearly 50% due to unequal weight distribution.
If your desk frame is noticeably out of alignment, you must level it manually.
Manual Leg Synchronization
If your frame is uneven, you can level the legs manually by disconnecting the slower motor.
Unplug the main power cable from the wall outlet.
Locate the motor output cables leading from the central control box to the lifting legs, and unplug the cable connected to the lower, correctly positioned leg.
Plug the main power cord back into the wall outlet.
Tap the “Up” or “Down” button carefully to move the remaining connected leg until it matches the exact physical height of the disconnected leg.
Unplug the main power cord again, reconnect the motor cable you removed, plug the main cord back into the wall, and run a standard system reset to lock in the new parallel position.
Leveling Glide Adjustments
Many minor structural tilts are caused by uneven floors rather than internal motor errors.
Crawl under your workstation and check the adjustable leveling glides on the underside of the steel feet.
Rotate the threaded rubber glides clockwise or counterclockwise to extend or retract them until the feet sit perfectly flat on the floor.
Use a bubble level on the top work surface to confirm the frame is completely level along both its length and width.
Error Codes and How to Fix Them
ASR Error
A review of office furniture support tickets shows that the “ASR” error code accounts for roughly 40% of all digital display service calls.
This code indicates that the control box has detected an uneven tracking error between its lifting columns.
ASR Error Resolution Workflow
The Root Cause: Left and right motor speed variances exceed the built-in system tolerance limits.
Step One: Completely unload all equipment, monitors, and peripherals from the desk surface.
Step Two: Execute a deep downward reset sequence to align the optical tracking parameters.
The Outcome: The internal control board syncs leg calibration heights and clears the active error readout.
The “ASR” code appears when the rotation speed or relative height of one lifting column differs from the other by more than the control module’s programmed tolerance limit.
This can happen if one side of the desk hits an object, or if a heavy item is placed entirely on one end of the work surface.
To fix an ASR error, clear all items from the desk, check that all motor cables are firmly plugged into the control box, and complete a full downward reset sequence to reset the internal optical tracking sensors.
Also see: Why Does My Standing Desk Say ASR?
LOC Error
The “LOC” code is a built-in safety setting rather than a component failure. It shows that the digital interface has been locked out to prevent accidental activation.
This electronic lock is designed to prevent children, pets, or cleaning crews from accidentally pressing buttons and moving the desk surface.
It can be turned on intentionally by holding down a specific button combination, or automatically after a prolonged period of system inactivity.
To clear the code and restore movement, press and hold the “Lock” button, the “M” button, or both the “Up” and “Down” arrows together for 5 to 8 seconds until the display screen updates.
Also see: What Does LOC Mean On Standing Desk?
Other Common Errors
When dealing with an adjustable standing height desk, reference this structured troubleshooting matrix to quickly identify, understand, and fix specific system faults.
| Error Code | Root System Cause | Immediate Practical Resolution Step |
|---|---|---|
| E01 / E02 | Overcurrent protection active due to physical obstruction or heavy load. | Remove heavy items from the work surface; check for and clear any physical obstructions under the desk. |
| E07 / E08 | Leg synchronization error; columns are at mismatched heights. | Unplug all motor cables, reconnect them firmly, and run a complete downward system reset. |
| E10 / E11 | Motor connection fault; control box cannot detect the lifting column. | Check the motor cable pins for damage; reconnect the cable firmly into the control box port. |
| HOT | Thermal protection active; control board or motor is overheating. | Stop operating the desk; let the system rest and cool down completely for 20 to 30 minutes. |
| Unresponsive | No incoming power or complete control panel lockup. | Test the wall outlet with another device; inspect the power brick connections for loose wires. |
Maintenance Tips to Prevent Future Issues
Regular Lubrication
Mechanical service data shows that applying clean lubricant to telescoping column glides every six months reduces internal motor friction by up to 22%, significantly extending the operational life of the drive system.
Lubrication Maintenance Protocol
Step 1: Raise the desk to its absolute maximum height to extend the lifting columns fully.
Step 2: Use a clean microfiber cloth to completely wipe away old grease, dust, and gray debris.
Step 3: Apply a light, even coat of 100% dry silicone spray or high-grade white lithium grease.
Step 4: Cycle the frame through its full range of movement twice to spread the lubrication evenly.
Raise your workstation to its maximum height to fully expose the steel telescoping columns.
Use a clean, dry microfiber cloth to wipe away old grease, dust, and debris from the steel surfaces.
Spray a light, even coat of 100% dry silicone lubricant or lithium grease onto the tracks.
Avoid using WD-40 or heavy petroleum-based oils, as they attract airborne dust and can gum up the internal gears.
Run the desk up and down through its full range of movement twice to spread the lubricant evenly across the internal guide blocks.
Screws and Bolts Check
Over months of routine height adjustments, the subtle vibrations from the electric motors can slowly loosen the assembly hardware.
This hardware laxity reduces the stability of an adjustable height ergonomic desk.
Set aside time every three to four months to inspect the structural fasteners beneath your workspace.
Use an Allen wrench or screwdriver to check and tighten the bolts holding the lifting columns to the main crossbar frame, as well as the wood screws securing the desktop to the steel structure.
Pay close attention to the small set screws on the drive shafts of single-motor setups; keeping these tight prevents structural play and reduces operational noise.
Lifting Column Bolts: Tighten to eliminate structural frame wobble during upper height transitions.
Frame Crossbars: Secure primary hardware connections to dampen electric motor operational vibrations.
Desktop Wood Screws: Fasten firmly to prevent surface shifting or structural popping sounds.
Weight Distribution Tips
To ensure long-term reliability, distribute the weight of your office equipment evenly across the work surface rather than grouping heavy items on one side.
Balanced Weight Surface Mapping
Left Outer Section: Allocated for lightweight items, including documents, writing tools, and tablets.
Center Core Zone: Dedicated to high-mass hardware, such as dual-monitor arm mounts and docking hubs.
Right Outer Section: Reserved for balanced mid-weight accessories, including laptops and task lamps.
Place heavy desktop computers, multi-monitor arrays, or dual-arm mounts as close to the center of the desktop as possible, or balance them evenly over both lifting columns.
When a heavy load sits entirely on one side, that leg’s motor must work harder, causing uneven wear on the internal drive gears.
Keeping the load balanced minimizes current draw variations, preventing unexpected system shutdowns or errors.
Avoiding Common Operational Mistakes
Facilities maintenance audits indicate that overrunning a desk’s engineered duty cycle is a leading cause of premature motor failure.
Most commercial-grade linear actuators use a 10% duty cycle rating, which translates to 2 minutes of continuous motor operation followed by 18 minutes of rest.
Avoid adjusting your desk height repeatedly within a short window, and never allow hanging power cords to pull taut at maximum height, as this can damage the internal control box ports.
Community Insights and Reddit Tips
Real-World Solutions From Users
Crowdsourced technical data from specialized online communities reveals that many persistent desk errors can be resolved using clever, non-standard troubleshooting techniques.
For example, users on office setups forums frequently share a trick for fixing stubborn “RST” loops: unplugging the digital keypad from the control box for 60 seconds while the frame is powered on forces the processor to reset its communication channels.
Another common community fix for intermittent power loss involves securing the external power brick directly to the metal frame using industrial hook-and-loop straps, preventing the cables from sagging or pulling loose during height transitions.
DIY Fixes vs. Manufacturer Recommendations
While technical forums offer helpful workarounds, it is important to balance DIY fixes with official manufacturer guidelines to avoid compromising your system or warranty.
| Troubleshooting Approach | Best For | Potential Risk Factor | Warranty Impact |
|---|---|---|---|
| Manufacturer Protocol | Software resets, checking cable connections, adjusting leveling glides. | Low risk; follows engineered safety profiles. | Fully preserved and supported. |
| Community DIY Advice | Fixing keypad communication errors, managing cables, DIY track lubrication. | Medium risk; depends on user skill. | Usually safe if components aren’t opened. |
| Advanced Component Repair | Opening motor casings, soldering wiring, splicing control box lines. | High risk; can cause electrical short circuits or gear damage. | Voided instantly by the manufacturer. |
Common Pitfalls to Avoid
A common mistake noted by community technicians is trying to force a stuck desk leg down by applying physical body weight to the desktop.
Modern linear actuators use worm gears that lock securely in place when power is removed; pressing down hard on the surface will strip the internal nylon gears rather than lowering the leg.
Another pitfall is using cheap extension cords or low-grade power strips that cannot deliver the peak current required by dual-motor systems during initial lifting transitions, which can cause the control box to log a false overcurrent error.
For reliable enterprise workspaces, sourcing high-quality products from Meet&Co ensures you receive durable components backed by clear documentation and expert support infrastructure.
Conclusion
Troubleshooting an electric sit-stand desk is usually straightforward once you understand how its internal control system operates.
Most performance issues, tracking errors, and digital display codes can be cleared by removing any physical obstructions and performing a standard downward reset sequence.
Taking time to maintain your workspace—such as checking structural hardware, balancing your equipment layout, and lubricating the lifting columns every six months—prevents unexpected system shutdowns and extends the life of your motor components.
If you have discovered an unusual fix or encountered a unique system code during your own repair process, feel free to share your experiences and tips in the comments section below to help fellow remote professionals keep their workspaces running smoothly.