


You have seen them popping up in offices everywhere. Those sleek little glass rooms tucked into open floor plans. They look nice. But how do you actually set one up so people want to use it?
An acoustic office pod is a freestanding, soundproofed space designed for quiet work, phone calls, or small meetings. But just buying one is not enough. Where you put it, how you arrange the inside, and what extras you add all matter.
Let us walk through some practical setup ideas. No complicated jargon. Just real tips you can use.
Why Your Office Needs Acoustic Pods (And Not Just More Cubicles)
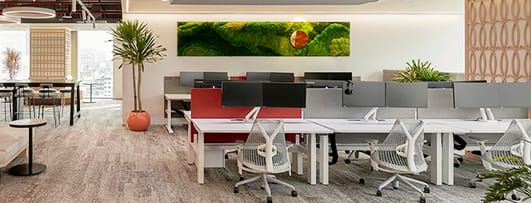
Open-plan offices have a well‑known problem: noise. Conversations travel. Phone calls echo. People trying to focus get interrupted constantly.
Acoustic pods solve this. They create enclosed environments for calls, focused work, or private meetings while keeping the flexibility of an open workspace.
Unlike traditional cubicles, these pods prioritize sound isolation through heavy insulation, tight seals, and acoustic paneling. They let people work side‑by‑side without driving each other crazy.
The result? Happier employees, fewer distractions, and a workplace that actually works for everyone.
Meet&Co Office Pod Series A
Where to Put Your Pods: Placement Strategies That Work
A pod is only as useful as its location. Put it in the wrong spot and no one uses it. Here is how to get it right.
1. Map Your Office Zones First
Every office supports four basic activities: focus work, collaboration, meetings, and rejuvenation. Walk through your space and mark where each happens. That becomes your “pod canvas”.
2. Match Pod Size to Zone Purpose
Different pods suit different needs. Quick calls need small phone booths. Team meetings need 4‑ to 6‑person pods. Deep focus work calls for something in between. A good rule of thumb: one solo pod per eight workstations, and one meeting pod per twenty employees.
Also see: Phone Booth vs. Focus Booth vs. Meeting Pod: What’s the Difference?
3. Give Pods Room to Breathe
Pods need clearance around them. Leave at least 9–12 inches above the roof for airflow. Keep 2 inches on the sides and back. And make sure doorways have a clear 36‑inch swing path. Good ventilation matters. Many pods come with built‑in silent fans that provide a steady flow of fresh air without causing distractions.
4. Think About Sound and Sight Lines
Face doors away from busy aisles. This reduces distraction when someone exits and preserves interior privacy. Stagger pods rather than stacking them in a row—alternating orientations stop sound paths from lining up.
5. Place Pods Where People Actually Are
Do not hide pods in forgotten corners. Line the edges of busy areas with small pods to create “whisper points”—easy‑to‑reach acoustic relief that keeps staff close to the action without being overwhelmed by it. Place larger pods between collaborative zones and quiet areas to create an “acoustic shadow” that blocks sound more effectively than decorative screens.
6. Make Accessibility a Priority
If you are buying pods, check for ADA compliance. Accessible pods need at least 32 inches of clear door width, a level threshold, and enough turning space inside for a wheelchair. Place accessible pods along main routes, not hidden in corners.
Inside the Pod: Design Ideas for Different Uses
The inside of your pod matters just as much as where it sits. Here are setup ideas for common use cases.
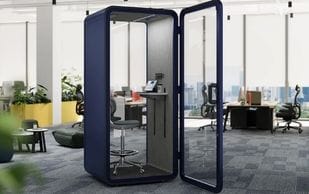
For Private Phone Calls and Video Meetings
The compact pod (1 person) is a workplace essential. It lets employees take calls without disturbing anyone else.
What to include:
-
A small shelf or narrow desk at standing height (around 42 inches) for propping a laptop
-
A comfortable stool or perching seat—most people do not sit for long in these
-
Good lighting that does not cast shadows on your face. Look for integrated LED ceiling lights or panels that simulate pleasant daylight
-
A mirror on the back wall (sounds small, but people love checking their appearance before video calls)
What to avoid:
-
Too much furniture. Space is tight. Keep it minimal.
-
Dark colors. They make a small space feel smaller.
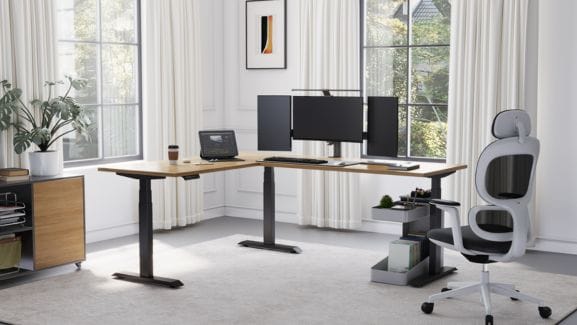
For Deep Focus Work
This setup is for someone who needs an hour of uninterrupted concentration. No phone calls. Just work.
What to include:
-
A proper desk with enough depth for a laptop, notebook, and coffee cup
-
An ergonomic chair with good back support. If your pod is from Meet&Co, pair it with one of their ergonomic models
-
A small plant or personal item. It makes the space feel less like a box
-
Adjustable lighting with warm color temperature to reduce eye strain during long sessions
-
Power outlets and USB ports for charging devices
What to avoid:
-
Phones. Seriously. Leave them at your desk. This is for deep work.
-
Clutter. Keep only what you need.

Meet&Co Office Pod Series D
For Small Team Meetings (2–4 People)
Collaboration pods are the workhorses of modern offices. They give small teams a private space to brainstorm without booking a full conference room.
What to include:
-
A central table large enough for laptops and notebooks. For a 4‑person pod, a table around 48 x 24 inches works well
-
Four comfortable chairs that do not take up too much floor space. Meet&Co‘s movable training chairs are a great fit here—they are lightweight and easy to reposition
-
A whiteboard on one wall (magnetic is even better)
-
A monitor mounted on the wall, with cables running neatly to a connection hub
-
Good ventilation. For multi‑person pods, ensure the airflow system matches occupancy—stuffy meetings are unproductive meetings
Setup tip: Place two chairs on each side of the table rather than all four facing the same direction. This makes everyone feel included.
What to avoid:
-
Overstuffing. A 4‑person pod should feel roomy, not cramped. Aim for at least 1.2 square meters of activity space per person
-
Complicated AV equipment. Keep it simple or no one will use it.
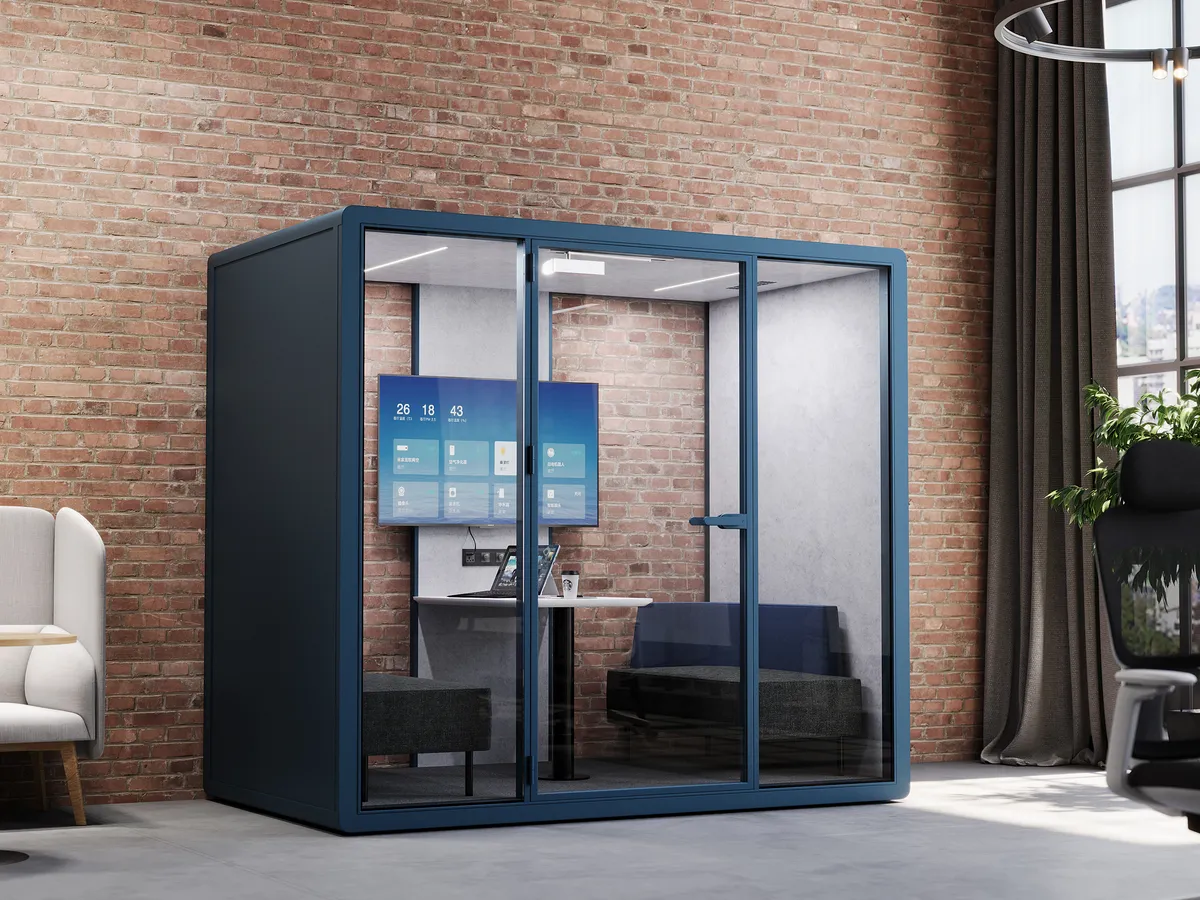
For Hybrid Meetings (Remote Participants)
Hybrid work is here to stay. Some pods are specifically designed for this, with built‑in cameras, speakers, and microphone arrays that make remote team members feel present.
What to include:
-
A high‑quality webcam mounted at eye level
-
A noise‑canceling speakerphone
-
A monitor positioned so remote participants can see everyone at the table
-
Acoustic treatment on the walls to reduce echo and reverb inside the pod
-
A booking system integrated with your calendar (Microsoft Teams, Outlook, or Google Calendar) so people can reserve the pod easily
What to avoid:
-
Echoey rooms. If your pod does not have acoustic paneling, add some yourself.
-
Bad lighting. No one looks good in harsh overhead light. Use soft, diffused lighting instead.
Also see: Top 10 Best Office Phone Booths in 2026
Smart Features Worth Adding
Modern acoustic pods can do more than just block noise. Here are some smart features that make a real difference.
Booking Systems
In busy offices, pods need reservations. Smart pods can be located, booked, and unlocked via mobile app or integrated directly into your company‘s calendar system. Some even auto‑reserve when you step inside.
Sensor‑Controlled Lighting and Ventilation
High‑end pods now come with sensors that adjust lighting and airflow automatically when someone enters. Adjustable color temperature (2700‑6500K) lets users choose warm or cool light depending on the task.
Power and Data Pre‑Wiring
Good pods arrive pre‑wired with power leads and Cat‑6 network cables. Multiple pods can share a single circuit, which keeps installation simple.
Acoustic Glass and Smart Seals
Not all pods are created equal. Look for acoustic glass, magnetic seals, and intelligent door design that improve isolation without making the space feel claustrophobic.
Common Mistakes to Avoid
Even with a great pod, small mistakes can ruin the experience.
-
Blocking HVAC grills. Do not place a pod directly under a ceiling vent or air return. It creates drafts and picks up fan noise.
-
Skipping accessibility. At least one pod on each floor should be ADA accessible, with wide doorways and turning space.
-
Ignoring natural light. If your office has windows, rotate pods so glazed backs face the light, not solid walls.
-
Forgetting about cleaning. Pods get used constantly. Have a cleaning schedule for inside surfaces, door handles, and ventilation filters.
| Pod Type | Best For | Suggested Setup |
|---|---|---|
| Phone booth (1 person) | Private calls, video meetings | Standing desk, stool, good lighting, mirror |
| Focus pod (1 person) | Deep work, concentration | Desk, ergonomic chair, warm lighting, minimal clutter |
| Meeting pod (2–4 people) | Team huddles, brainstorming | Central table, whiteboard, monitor, good ventilation |
| Hybrid meeting pod (2–6 people) | Remote collaboration | Camera, speakerphone, monitor, acoustic treatment |
Frequently Asked Questions (FAQ)
1. How many acoustic pods does my office need?
A good starting point is one solo pod per eight open‑plan workstations, and one meeting pod per twenty employees. Track usage for the first few months, then add or reposition as demand grows.
2. Do acoustic pods need special ventilation?
Yes. Proper airflow is essential, especially for multi‑person pods. Look for pods with built‑in silent fans that provide continuous fresh air. Some high‑end models even have UV‑C air purification. Without good ventilation, pods become stuffy and uncomfortable after 30–40 minutes.
3. Can I put acoustic pods anywhere in my office?
Almost anywhere, but check a few things first: ceiling height (need at least 9–12 inches clearance above the pod), power access (pre‑wired pods need outlets nearby), and building codes (sprinkler systems must not be blocked). Most pods are freestanding and require no construction, so they can be moved later if needed.
Final Thoughts
Acoustic office pods are not a passing trend. They solve a real problem: how to keep the energy of an open office without losing the ability to focus. By placing them thoughtfully, equipping them well, and avoiding common mistakes, you turn a simple box into a workplace superpower.
Whether you need a quiet phone booth, a focus room, or a small meeting space, the right pod setup makes all the difference.


