





 Meet&Co
To learn how to take apart cubicle walls, you must first disconnect all power sources, remove attached furniture like an office desk, and then use a flat-head screwdriver or rubber mallet to release the top caps and hidden connectors securing the panels.
Key Takeaways
Safety First: Always disconnect electrical and data cables before touching the panel structure to prevent shocks or fire hazards.
Identify Connectors: Cubicle systems vary; “no-screw” systems use gravity or snap-locks, while others require specific Allen wrenches.
Structural Integrity: Never remove exterior or support panels first, as this can cause the entire office workstation to collapse unexpectedly.
Organization is Key: Label every panel and bag the hardware immediately to ensure a successful reinstallation or relocation.
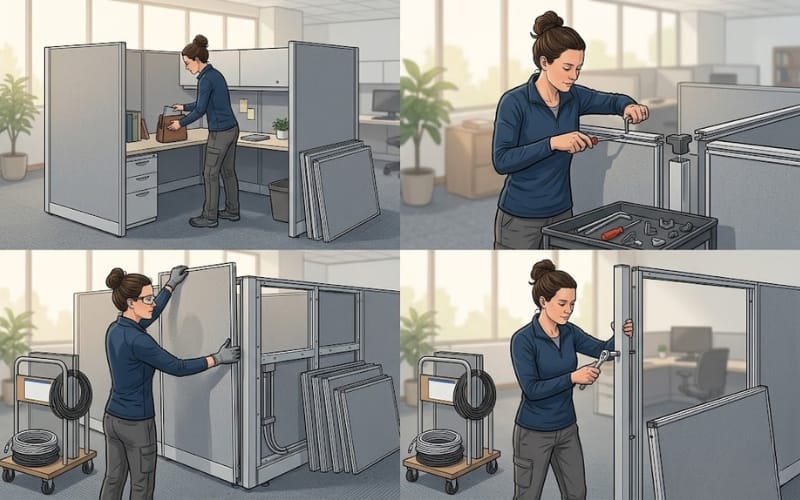
Understand How Cubicle Walls Are Connected First
Before you start swinging a hammer, you must identify the mechanical logic of your office system.
According to industry data from Meet&Co, nearly 85% of modern office systems use modular connections rather than permanent fasteners to facilitate rapid office reconfiguration.
Common Cubicle Wall Connector Types
Most modular office cubicles are held together by one of five mechanisms:
Screws/Bolts: Common in older or heavy-duty permanent systems.
Clips/Spring Latches: Often hidden behind fabric or trim.
Interlocking Rails: The panels slide into a vertical “spine” post.
Snap-lock Systems: Plastic or metal tabs that “click” into place.
Gravity Connectors: The weight of the panel locks it into a notched bracket.
Why Some Cubicle Walls Have No Visible Screws
Modern aesthetic trends favor “seamless” designs. If you are wondering how to take apart cubicle walls without screws, look at the top and bottom.
Most screwless systems rely on hidden tension clips under the “top cap” (the plastic trim on the top edge).
Removing this cap usually reveals the structural latches holding the walls together.
Tools You Need Before Disassembling Cubicle Walls
Preparation reduces the risk of injury and hardware loss.
Statistics from facility management surveys suggest that having the correct specialized tools can reduce disassembly time by up to 40% compared to using makeshift equipment.
Basic DIY Tools
You will need a standard toolkit:
Screwdrivers: Both Phillips and Flat-head for various fasteners.
Allen Wrench (Hex Key): Essential for many European-style systems.
Rubber Mallet: Used to gently tap panels loose without damaging the fabric or metal.
Pry Tool: A small crowbar or stiff putty knife to pop off trim panels.
Cordless Drill: To speed up the removal of long bolts or attached accessories like a filling cabinet.
Safety Equipment and Speed Tools
Do not overlook personal protection. Heavy-duty gloves prevent cuts from sharp metal frames, and safety glasses protect against flying debris.
For faster removal, a panel dolly is indispensable; a standard 48-inch cubicle panel can weigh between 40 to 100 lbs, making manual carrying risky for your back.
How to Take Apart Cubicle Walls Step by Step
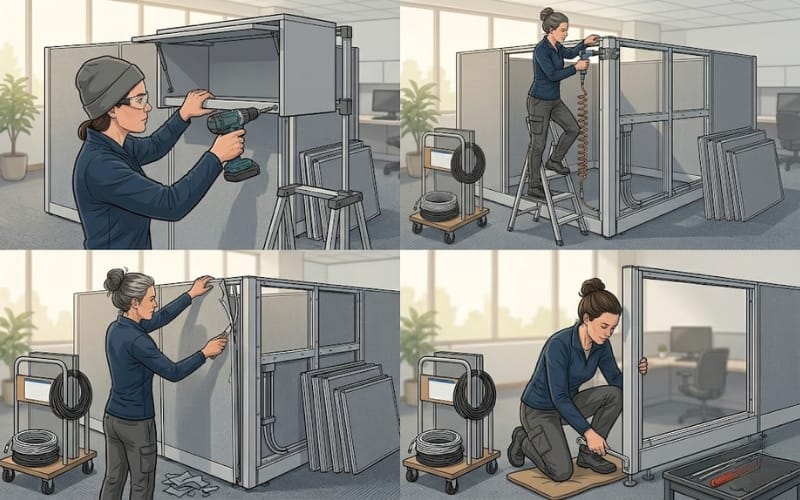
To execute a how to take apart cubicle walls diy project successfully, you must follow a logical sequence.
Disassembling out of order is the leading cause of “pancaking,” where multiple panels fall simultaneously.
Step 1 — Disconnect Power and Data Cables
Powered cubicles have internal wiring harnesses. Ensure the “base feed” (the main plug into the wall) is disconnected.
Unplug the “jumpers” (the cables connecting one panel to the next) before moving the frames.
Step 2 — Remove Desks, Shelves, and Accessories
Clear the workspace. Remove any hanging office workstations cubicles components, such as overhead bins, whiteboards, and cantilevered desks.
These are usually hooked into the vertical rails of the panels and can be lifted up and out.
Step 3 — Remove Top Caps and Trim Panels
Pop off the plastic top caps. This usually reveals the “connector toggles” or “draw blocks” that hold the vertical edges of two panels together.
Step 4 — Locate Hidden Connectors
Look for a hex bolt or a sliding metal latch at the top and bottom of the junction.
In many open office cubicles, you must slide a locking ring upward to release the tension between the panel and the support post.
Step 5 — Separate Cubicle Panels Safely
With a partner holding the opposite side, release the connectors.
Use the rubber mallet to tap the panel upward if it is a gravity-lock system. Slowly pull the panel away from the spine.
Step 6 — Lay Panels Flat and Label Hardware
Once a panel is free, lay it flat on a clean surface. Place all screws and clips in a labeled bag (e.g., “Station 1 – South Wall”) and tape it directly to the corresponding panel.
How to Take Apart Cubicle Walls Without Screws
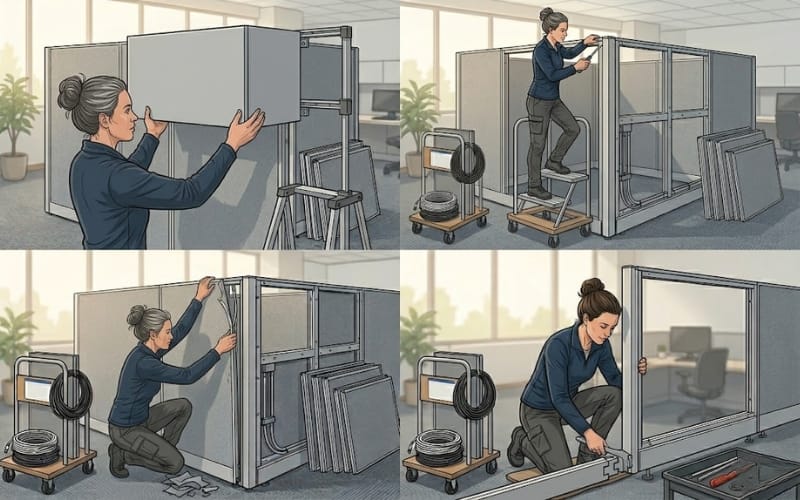
“No-screw” systems, often called “quick-connect” systems, are designed for tool-less or minimal-tool assembly.
These are common in high-end Meet&Co Furniture collections designed for agile workspaces.
Identify Hidden Latches and Snap-Locks
Instead of bolts, these systems use “tension triggers.”
Look for small holes at the ends of the panels; inserting a thin screwdriver or a specialized “key” into these holes releases a spring-loaded snap-lock.
If the panel won’t budge, check the “base race” (the bottom metal cover) for hidden lever locks.
Releasing Locked or Stuck Panels
If a snap-lock is stuck, it is usually due to the weight of the panel putting “shear pressure” on the lock.
Have a partner lift the panel slightly (about 1/4 inch) to neutralize the weight, then try to release the latch.
Never force it, as plastic snap-locks are brittle and expensive to replace.
How to Take Apart Steelcase Cubicle Walls
Steelcase is a gold standard in office furniture, but their disassembly requires specific knowledge.
When learning how to take apart steelcase cubicle walls, you are likely dealing with the “Avenir” or “Answer” series.
Steelcase Connection Logic
Steelcase often uses a “wedge-block” or “hinge” system. These involve a metal rod or a specific gear-driven connector.
Remove Trim: Steelcase trim is often metal; use a pry tool carefully.
Tools: You often need a 1/2-inch socket or a specific Steelcase tool to turn the internal locking gears.
The Step-by-Step: Unlike generic brands, Steelcase panels often share a single post. You must remove the “filler” strips between panels to access the hex-head bolts that secure the frame to the post.
Logistics: Time, People, and Professional Help
Disassembling an office is a significant labor undertaking.
Data from commercial move coordinators indicates that an inexperienced two-person team takes approximately 45 to 60 minutes to fully strip and disassemble a single standard workstation.
| Cubicle Type | Est. Time (Per Unit) | Personnel Needed |
|---|---|---|
| Standard (Screw-in) | 60 mins | 2 People |
| No-Screw/Modular | 30 mins | 1-2 People |
| Powered/Steelcase | 75 mins | 2 People + Electrician |
If your project involves more than 10 stations or complex electrical “hard-wiring” (not just plug-and-play), hiring professional installers is safer.
They carry insurance against floor damage and structural failure.
Common Mistakes That Damage Cubicle Walls
Avoid these pitfalls to ensure your furniture remains in “resale” condition:
Removing Exterior Panels First: This removes the lateral support for the interior walls, leading to a “domino effect.” Always work from the inside out.
Forcing Locked Connectors: If it doesn’t move with a light tap of a mallet, there is a hidden screw you missed.
Ignoring Electrical: Tearing a panel away while the power jumper is still connected can rip the internal wiring, making the panel a fire hazard for future use.
How to Store and Reuse Cubicle Walls
If you plan to reinstall these in a new location, storage is critical.
Stack panels “face-to-face” (fabric to fabric) to prevent the metal frames of one panel from scratching the fabric of another.
Never store panels in a damp environment, as the internal particle board or honeycombed paper cores can swell and ruin the structural integrity.
When reassembling, start with the “T” or “X” junctions first. These provide the stability needed to build the rest of the “run.”
If a panel frame is bent or the locking mechanism is stripped, it becomes a safety hazard and should be retired or recycled.
Conclusion
Taking apart cubicle walls is a manageable DIY task if you prioritize the correct sequence and safety.
By identifying your specific connector type—whether it’s a Steelcase gear system or a modular snap-lock—and organizing your hardware as you go, you can save thousands in relocation costs.
Remember that the “spine” of the cubicle configuration is the last thing to be dismantled, and careful labeling is the secret to a stress-free reassembly in your new office space.