


You’ve invested in an ergonomic office chair. But did you know that even the best chair won’t protect your back unless it’s adjusted correctly? Studies show that up to 80% of office workers experience back pain, often because their chair settings are either ignored or set incorrectly.
The good news: proper adjustment takes less than five minutes. With a few simple tweaks, you can transform your chair from a source of discomfort into a tool that actively supports your spine, reduces fatigue, and boosts productivity.
This step-by-step guide will walk you through the essential adjustments to achieve perfect posture while seated. Whether you have a basic task chair or a high-end ergonomic model, these principles apply.
Why Proper Chair Adjustment Matters
Sitting for extended periods places significant stress on your spine, shoulders, and hips. When your chair is misaligned, your body compensates—slouching, leaning forward, or twisting—which can lead to:
Chronic lower back pain
Neck and shoulder tension
Reduced circulation to legs
Fatigue and decreased focus
A properly adjusted office chair supports your body’s natural curves, keeps your joints in neutral alignment, and distributes your weight evenly. The result is less strain, more energy, and a foundation for long-term musculoskeletal health.

Step 1: Start with Seat Height
Your seat height is the most critical adjustment. It determines whether your feet can rest flat and your thighs remain parallel to the floor.
How to adjust:
Sit with your back against the chair.
Raise or lower the seat so that your hips are slightly higher than your knees (or at least level).
Your feet should rest flat on the floor (or on a footrest if the chair cannot go low enough).
Your thighs should be parallel to the floor, not pressing against the front edge of the seat.
Check: There should be 2–3 fingers of space between the back of your knee and the front edge of the seat cushion.
Tip: If your chair has a pneumatic lever, adjust while seated. Use a footrest if your feet do not reach the floor after lowering the seat fully.
Step 2: Adjust Seat Depth
Seat depth ensures your lower back is supported without cutting off circulation behind your knees. Many ergonomic chairs have a seat slider mechanism.
How to adjust:
Slide the seat pan forward or backward until you have a fist-sized gap (about 2–3 inches) between the back of your knees and the seat edge.
Your back should remain in contact with the backrest.
If your chair lacks seat depth adjustment: Use a lumbar cushion to push your hips forward slightly, or ensure your sit bones are fully supported.
Step 3: Set Lumbar Support
Lumbar support fills the natural inward curve of your lower back. Without it, you’ll tend to slouch or put pressure on your spine.
How to adjust:
Locate the lumbar mechanism (built-in pad or adjustable knob/lever).
Position the support so it fits snugly into the curve of your lower back, just above the beltline.
If the support is height‑adjustable, move it up or down until you feel even pressure.
No built-in lumbar support? Use a rolled towel or a small lumbar cushion placed at the curve of your back.
Step 4: Adjust Backrest Angle and Tilt
A reclined backrest reduces pressure on spinal discs, but you also need to be able to work comfortably. The key is to find a balance between support and mobility.
How to adjust:
Use the tilt lever to allow the backrest to recline slightly (100–110 degrees is ideal).
Engage the tilt tension knob so you can lean back with moderate resistance.
If your chair has a tilt lock, you can set a fixed upright position for focused work, then release for movement.
Ergonomic tip: Your back should remain in full contact with the backrest at all times. Avoid sitting forward without support.
Step 5: Position Armrests
Armrests support your arms and shoulders, preventing you from hunching. Poorly adjusted armrests can force your shoulders up or cause you to lean.
How to adjust (if armrests are adjustable):
Height: Raise or lower so your elbows form a 90-degree angle when your hands rest on the armrests, and your shoulders are relaxed (not shrugged).
Width: Adjust so your arms are not forced outward or inward.
Pivot/depth: Some armrests also move forward/back or rotate. Set them so they support your forearms while typing or mousing.
Note: When not typing, you can lower armrests out of the way. They should never prevent you from getting close to your desk.
Step 6: Check Headrest (If Equipped)
A headrest supports your neck and upper spine, especially during reclined postures.
How to adjust:
Position the headrest so the center of the pad cradles the back of your head, not your neck.
Your neck should be in a neutral position, not forced forward or tilted back.
Also see: Can You Add a Headrest to Any Office Chair? A Guide
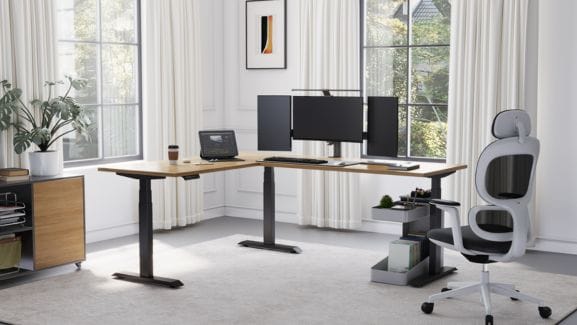
Step 7: Verify Monitor and Desk Alignment
Chair adjustments must work in harmony with your desk and screen. Even with a perfect chair, poor monitor placement will cause you to lean.
Quick checks:
Monitor top at or slightly below eye level.
Monitor distance about an arm’s length away.
Keyboard and mouse at elbow height, wrists straight.
Desk height should allow your elbows to rest comfortably when typing.
If your desk is too high, a footrest can help raise your feet while you raise the chair accordingly.

Step 8: Fine-Tune and Reassess
After making all adjustments, sit for a few minutes and notice any pressure points. Make small tweaks until you feel balanced and supported.
Test:
Can you slide your hand between the front edge of the seat and your thighs? (Good)
Do your shoulders feel relaxed? (Good)
Is your lower back supported without feeling poked? (Good)
Revisit these adjustments every few months or whenever someone else uses your chair.
Quick Reference: Chair Adjustment Checklist
| Step | Adjustment | Goal |
|---|---|---|
| 1 | Seat Height | Feet flat, thighs parallel, hips slightly higher than knees |
| 2 | Seat Depth | 2–3 finger gap between knees and seat edge |
| 3 | Lumbar Support | Fits curve of lower back, even pressure |
| 4 | Backrest Angle | 100–110°, full back contact |
| 5 | Armrests | Elbows 90°, shoulders relaxed, supports forearms |
| 6 | Headrest | Cradles head, neck neutral |
| 7 | Monitor/Desk | Top of screen at or below eye level, elbows at desk height |
| 8 | Fine-Tune | Comfort check after 10 minutes |
Frequently Asked Questions
1. How do I know if my chair is adjusted correctly?
You should feel no strain or discomfort. Your feet are flat, your back is supported, your shoulders are relaxed, and you can easily reach your keyboard without leaning forward. If you experience pain after 30 minutes, something is likely misaligned.
2. Should my office chair be locked upright or allowed to recline?
A mix of both is ideal. Use a locked upright position for focused computer work, but unlock the tilt to allow movement during meetings, reading, or breaks. Movement changes the load on your spine and helps prevent stiffness.
3. What if my chair doesn’t have all these adjustments?
Focus on what you can adjust: seat height, adding a lumbar cushion, and using a footrest if needed. Even basic chairs can be made more ergonomic with aftermarket supports. However, if you sit for 6+ hours daily, investing in a chair with full adjustability is recommended.
4. How often should I change my seated posture?
Even the perfect chair should not keep you static. Aim to change your posture every 20–30 minutes—lean back, sit forward, stand up, or stretch. The best chair is one that allows easy movement.
5. Can proper chair adjustment really eliminate back pain?
For many people, yes. Poor posture is a primary cause of work-related back pain. Correctly adjusting your chair addresses the root cause. However, if pain persists, consult a healthcare professional—it may indicate an underlying condition or the need for additional ergonomic solutions like a sit-stand desk.
Conclusion
Achieving perfect posture doesn’t require expensive equipment—it requires knowing how to use the equipment you have. By following these eight steps, you can tailor your office chair to your unique body dimensions, creating a supportive environment that reduces pain, enhances focus, and keeps you comfortable throughout the workday.
Take five minutes today to go through the checklist. Your back will thank you.
Need a chair that can be properly adjusted? Browse our selection of fully ergonomic office chairs designed for all-day comfort.