


You know the feeling. You adjust your chair to the perfect height, settle into your work, and then—slowly, almost imperceptibly—you start to descend. Twenty minutes later, you’re craning your neck toward your monitor, wondering how you ended up so low.
A sinking office chair is one of the most frustrating workplace annoyances. It disrupts your focus, ruins your posture, and eventually becomes impossible to ignore. But here’s the good news: you don’t need to buy a new chair.
In most cases, the problem is a worn-out gas lift cylinder—a component that costs $20–60 to replace and takes about 30 minutes to install. Whether you’re looking for a quick temporary fix or a permanent solution, this 2026 guide walks you through everything you need to know.
Why Does My Office Chair Keep Sinking?
Before fixing anything, it helps to understand what’s actually broken.
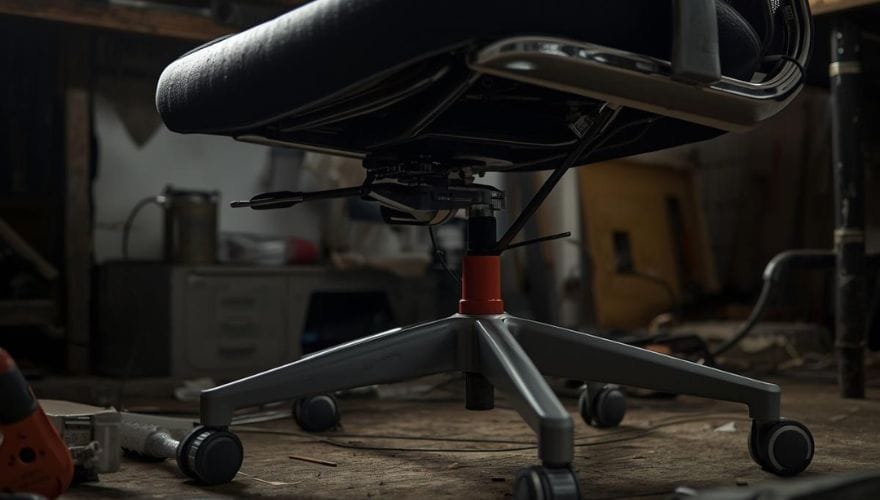
The Gas Lift Cylinder Explained
The gas lift (also called hydraulic cylinder or pneumatic piston) is the mechanism that allows height adjustment in most office chairs. It uses compressed nitrogen gas inside a sealed cylinder to support your weight. When you activate the height adjustment lever, it opens a valve that allows gas to flow between chambers, raising or lowering the seat.
Common Causes of Sinking
| Cause | What Happens |
| Worn internal seals | Over time, seals dry out and crack, allowing gas to escape slowly |
| Exceeding weight capacity | Constant overload stresses the cylinder beyond its design limits |
| Natural aging | Most gas lifts last 3–7 years with normal use |
| Manufacturing defects | Lower-quality cylinders may fail prematurely |
Signs You Need a Replacement
Not every height issue requires cylinder replacement. Here are the telltale signs that your gas lift is failing :
- Slow sinking: You adjust to the right height, and within minutes you’re gradually descending
- Immediate drop: The chair sinks to the lowest position as soon as you sit down
- No adjustment: The lever moves freely but nothing happens
- Stuck at one height: The chair won’t move up or down at all
- Hissing sounds: Audible gas escape when adjusting height
If your chair shows any of these symptoms, cylinder replacement is likely your solution.
Quick Temporary Fixes (When You Need Relief Now)
Sometimes you can’t wait for a replacement part to arrive. Here are three temporary solutions that cost under $10 and take minutes to implement.
1. Hose Clamp Method
This simple fix uses an adjustable metal clamp to stop the chair from sinking.
What you’ll need:
- Adjustable hose clamp (hardware store, $3–5)
- Screwdriver
Steps :
- Raise the chair to your desired height
- Clean the metal cylinder with a dry cloth
- Wrap the hose clamp around the cylinder just above the base
- Tighten securely with a screwdriver
- Test by sitting—tighten further if needed
Pros: Cheap, fast, works immediately
Cons: Disables height adjustment; clamp can slip over time
2. PVC Pipe Collar
A piece of PVC pipe creates a physical stop that prevents the chair from lowering.
What you’ll need:
- PVC pipe (2-inch diameter, slightly larger than your cylinder)
- Hacksaw
- Sandpaper (optional)
Steps :
- Raise chair to desired height
- Measure the exposed portion of the cylinder
- Cut PVC pipe to that length
- Slit the pipe lengthwise so it can snap around the cylinder
- Slide the collar into place
Pros: More secure than hose clamp, costs about $3
Cons: Permanent-looking; disables height adjustment
3. Duct Tape (Absolute Last Resort)
When you have nothing else, duct tape can buy you a day or two.
Steps:
- Raise chair to desired height
- Wrap duct tape around the cylinder repeatedly
- Build up a thick collar (at least 1/2 inch thick)
Pros: Uses materials you already have
Cons: Looks terrible; fails quickly; tape residue cleanup later
Temporary Fixes Comparison
| Method | Cost | Durability | Height Adjustment | Best For |
| Hose clamp | $3–5 | Weeks | Lost | Quick stop-gap |
| PVC pipe | $3 | Months | Lost | Medium-term solution |
| Duct tape | Free | Days | Lost | Emergency only |
The Permanent Solution: Replacing Your Gas Lift Cylinder
If you want your chair working like new again, cylinder replacement is the way to go. It’s surprisingly straightforward and costs a fraction of a new chair.
Tools and Materials Needed
| Item | Purpose |
| Replacement gas cylinder | The new part ($20–60) |
| Pipe wrench (14-inch preferred) | Gripping and twisting the cylinder |
| Rubber mallet | Tapping components loose |
| WD-40 or penetrating oil | Loosening stuck cylinders |
| Protective gloves | Safety and grip |
| Cardboard/blankets | Protecting floors |
Step 1: Remove the Base and Wheels
Turn your chair upside down on a protected surface. Most wheel bases simply pull straight off—if it’s stubborn, give it a firm tug or tap with a rubber mallet. Remove any retaining clips or pins holding the cylinder in place.
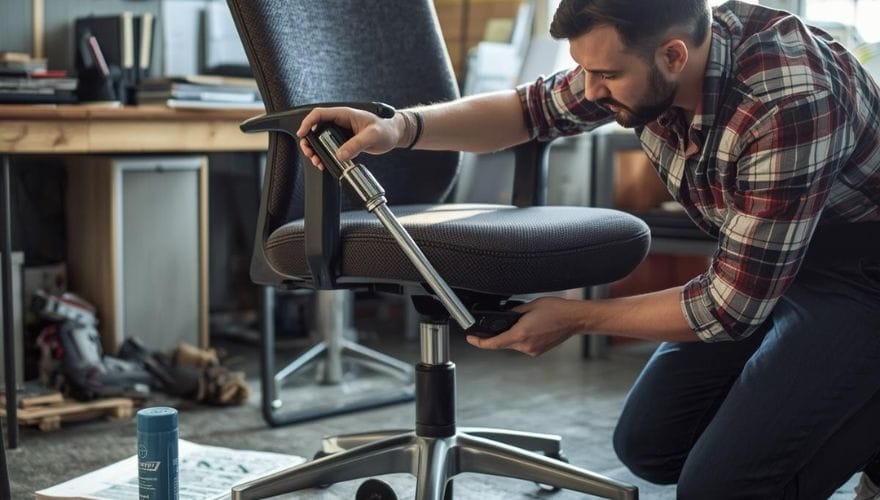
Step 2: Remove the Old Cylinder
This is often the hardest part. Position your pipe wrench around the cylinder as close to the mechanism as possible. Grip tightly and twist counter-clockwise.
If it won’t budge :
- Apply WD-40 around the connection point and wait 15–30 minutes
- Use a rubber mallet to tap around the base plate (4–6 taps usually does it)
- Try the “hammer technique”: hold the chair sideways and strike the cylinder firmly near the base
Alternative methods :
- Use a large adjustable wrench with cloth-wrapped jaws
- Apply gentle heat with a hairdryer to expand the metal
- For truly stuck cylinders, soak overnight in penetrating oil
Step 3: Install the New Cylinder
Clean the mechanism where the cylinder sits, removing any debris or old lubricant. Insert the new cylinder into the mechanism first—it should slide in with firm pressure. Don’t hammer it; if it doesn’t go easily, check alignment.
Reattach the base by pressing firmly until it clicks into place. A few gentle taps with your rubber mallet can help seat it completely.
Step 4: Test and Enjoy
Turn the chair upright and test the height adjustment. The new cylinder should move smoothly up and down. Sit gently at first, then add your full weight to ensure it holds properly.
Also see: How to Fix a Wobbly Chair: Simple Solutions That Actually Work
Choosing the Right Replacement Cylinder
Not all gas lifts are created equal. Here’s what to look for:
Key Specifications
| Feature | What to Check |
| Diameter | Most chairs use standard 2-inch (50mm) cylinders |
| Stroke length | Height adjustment range (typically 4–10 inches) |
| Weight capacity | Standard: 250–300 lbs; Heavy-duty: 400–1000+ lbs |
| Class rating | Class 3 (standard), Class 4 (heavy-duty) |
Quality Indicators
Look for these markers of a quality cylinder :
- BIFMA certification: Indicates durability testing
- Steel construction: Not cheap aluminum
- Smooth action: No jerky movement or grinding
- Warranty: Multi-year coverage signals confidence
Universal vs. Brand-Specific
Most chairs use universal cylinders, but premium brands like Herman Miller may require specific parts. When in doubt, measure your old cylinder or check the manufacturer’s website.
Where to Buy
- Amazon/Newegg: Wide selection, user reviews, $20–60
- Office supply stores: Convenient but often pricier
- Manufacturer direct: For premium chairs
- Local furniture repair shops: Can order for you
Preventative Maintenance: Making Your New Cylinder Last

Once you’ve fixed your chair, keep it working with simple maintenance :
Monthly Checks
- Clean dust and debris from the cylinder with a dry cloth
- Check for oil leaks around the seals
- Tighten any loose screws or bolts
Every 3–6 Months
- Apply silicone lubricant to moving parts (not WD-40, which attracts dust)
- Inspect the base and casters for damage
- Test height adjustment through full range
Long-Term Care
- Respect weight limits: Don’t exceed manufacturer specifications
- Avoid sudden movements: No aggressive rocking or bouncing
- Use a chair mat: Protects casters and reduces strain on the mechanism
- Keep it clean: Dust accelerates wear on seals
When to Replace Instead of Repair
Sometimes a new cylinder isn’t worth the effort. Consider replacement if :
- Multiple components failing: Worn padding, broken armrests, damaged base
- Chair is low-quality: Budget chairs often cost less than parts + labor
- Structural damage: Cracked frame or bent base (safety risk)
- Age: If the chair is 10+ years old with other wear
A good rule: if the chair cost under $150 new and has other issues, replacement probably makes more sense.
Professional Repair Option
If DIY isn’t your style, professional repair is available :
- Typical cost: $50–100 for cylinder replacement
- Turnaround: Often same-day at local shops
- Best for: Premium chairs, stuck cylinders, or if you lack tools
Check with local furniture repair shops or office supply stores—many offer repair services.
FAQ
How long do office chair gas cylinders last?
Most last 3–7 years with normal use. Higher-quality cylinders (Class 4) and proper maintenance can extend lifespan to 10+ years.
Is it safe to use a sinking chair temporarily?
Short-term use with temporary fixes is generally safe, but a sinking chair compromises posture and can cause back strain. Fix it promptly.
Can I repair a gas cylinder instead of replacing it?
Internal seals cannot be repaired—the cylinder is sealed at the factory. Replacement is the only permanent fix.
How much does a replacement cylinder cost?
$20–60 for the part. Professional installation adds $50–100.
Will any universal cylinder fit my chair?
Most standard office chairs use 2-inch diameter cylinders, but measure yours to be sure. Premium brands may require specific parts.
Why does my new cylinder still sink?
Possible causes: incorrect size, improper installation, or cheap/low-quality cylinder. Check compatibility and try a Class 4 heavy-duty option.
Conclusion
A sinking office chair is frustrating, but it’s rarely the end of the road. With a $30 replacement cylinder and about 30 minutes of your time, you can restore your chair to like-new condition. Temporary fixes like hose clamps or PVC pipe collars work when you need immediate relief, but cylinder replacement is the only permanent solution.
Remember these key takeaways:
- Diagnose first: Confirm it’s the cylinder, not the lever mechanism
- Temporary fixes: Hose clamp or PVC pipe for quick relief
- Permanent fix: Replace the cylinder—it’s easier than you think
- Choose quality: Look for BIFMA certification and Class 4 rating
- Maintain: Regular cleaning and lubrication extend cylinder life
Your chair supports you for thousands of hours each year. A little maintenance—and an occasional replacement—keeps it supporting you properly for years to come.

_1-1.webp)
_20.webp)